If you search on Pinterest for “curly hair travel tips” the Top 10 results are tips from blonde girls with wavy hair. Or better yet, blonde girls with straight hair offering to teach you how to use a curling wand into a carry on.
As a black girl with curly hair this is indescribably frustrating.
The black hair care business is a 2.5 billion dollar industry yet limited resources exist for us—the population with the curliest hair—and we sit on page 4 of Google. So, I assembled this definitive guide of anything we could possibly ever want to know about traveling with curly hair.
Of course anyone is welcome in this space to learn and take any inspiration for their own hair care, but know that the products and techniques used are from my personal experiences as a multiracial traveler with African heritage, and are intended for travelers with really curly hair.
You can reference and save the entire list of products mentioned in this article here.
This post may have affiliate links. Meaning if you buy something using them, I get a small % for recommending it. It won't change the price for you and it's a super easy and nice way to say thanks for the work I did creating this 🙂 Cool? Cool.
Know Your Fro: Do A Hair Assessment
Knowing as much information as possible about your hair is essential in being able to correctly care for it especially when traveling on planes, trains, and automobiles.
Identifying your hair type, knowing your hair’s tendencies, and knowing your own hair habits and common styles can give a lot of insight into how you decide to manage your hair on trips.
Hair Type: 3C
Hair Tendencies:
- Fine, dense hair
- Does not respond well to oils
- Needs creams and waxs
- Bleached, colors
Hair Care Habits:
- Hair is usually worn out and in a fro
- Curly bangs
- Almost daily detangling with water in the back 🥲
- Minimal heat straightening
Doing this analysis on your own hair and habits will help you understand your hair better and adjust the following tips for your own needs.
Packing Your Hair Products
When traveling I usually bring a detangler, a leave-in, a serum, and a gel—I’ll get into more details on these later.
To bring these on a plane, they must be in TSA Approved containers and follow their 3-1-1 rule. meaning they must be clear plastic bottles 3.4oz or less, and placed inside of a clear 1-quart sized plastic bag.
I bought carry-on approved plastic bottles on Amazon and reuse them every single time I travel now.
If you find you’ve forgotten to pack or run out of a product while you’re traveling, don’t panic. If you can’t live without it, look up the ingredients of the product and see if you can DIY it. Jojoba oil, coconut oil, argan oil, and other products are common and can usually be found in some form all over the world.
How I style my curls while traveling
You should know early on that I am simply not a product snob.
I don’t discriminate between L’Oreal and salon quality products, whatever works for the best price is what I’m gonna use. So if I recommend a pricy hair product it’s either because I truly cannot function without it or because it will literally last up to a year.
Again, you can get the entire list of recommended products here on Amazon.
My daily go-to curly 3C travel routine
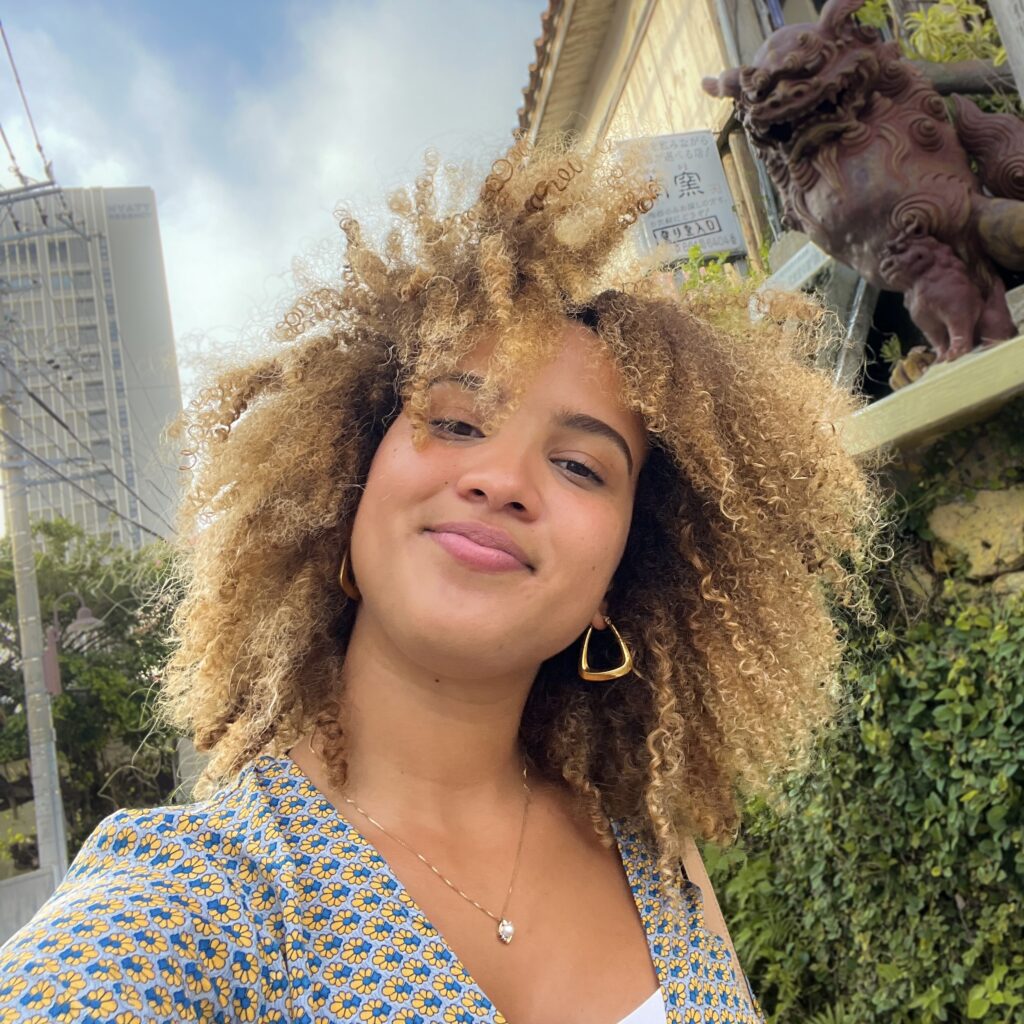
For my signature “wash n go” curly fro…
- Wet, wash, and detangle in the shower.
- Cleansing shampoo:
- Finish with a repairing conditioner like Olaplex No. 8 Bond Intense Moisture Mask or K18 leave-in molecular repair hair mask. wet I’ll let it dry 25-50% of the way before I begin to style it. Hotel towels are often rough and can tear delicate hair, so I recommend bringing your own microfiber towel.
I then use Shea Moisture Extra Moisture Detangler and the Shea Moisture Curl Enhancing Smoothie and finger comb my hair to remove any huge knots. All the while making sure my bangs are separate from the rest of my hair.
- I brush through the length of my hair starting from the ends up to the roots with a paddle brush to get any smaller tangles.
- For me, paddle brushes rip my hair the least and helps define the curls
- When using the paddle brush I split my head in half from temple-to-temple horizontally so that my curls can have definition but also bounce once it dries.
- Use a Denman Brush from about halfway down the hair shaft to the ends to help clump my curls together (I separate the clumps when fully dried!)
- I grab my bangs and separate them into three horizontal rows across my head. Starting with the row closest to my face, I put a little of the Curl Enhancing Smoothie on the hair and finger curl individual curls. I probably get 4-6 curls across the bottom row. Repeat for the second and third row.
- Then I rub a quarter-sized amount of my Garnier Fructis Style Curl Scrunch Controlling Gel into my hands and scrunch my bangs and the end of my hair. I love this gel because it never gives me crunchy ramen hair and still holds the definition when I separate my curls.
- I like to air dry my hair but if I’m in a rush or its freezing cold outside I’ll use a diffuser on warm heat and low pressure to gently dry it, starting from my scalp and then scrunching the ends with it. This can take 20-25 minutes.
- Once it’s completely dried I’ll separate any huge chunks of curls around my head, and selectively separate any of the finger curls I did for my bangs. And BAM, that’s my daily look!
Curly Girl Travel Hair Style Ideas
Bang'n Bun
I’ve found that curly bangs give me a lot more versatility with my curly styles, especially when traveling! No shame, I cut them myself with only kiddie scissors and this YouTube video for guidance, and they turned out pretty well I think.
The photo to the right I took just seconds after I cut them.
This super-simple style also works if you’ll be on a plane so the bulk of your hair is on top of your head and won’t make laying your head back uncomfortable.
Low Fro Pony
The low ponytail can is tried and true. This style is great for a high humidity environment because you can slick down the top with gel and a boar bristle brush. The brush linked is my favorite because it’s ethically harvest boar bristles and no animals are hurt in the making of the brush.
$20 is a lot for a brush, but it’s small and easily packed for travel, and lasts forever. Not to mention, you can’t have elaborate cute curls every day. This brush is essential for those hopeless moments when you just want to lay your baby hairs and just not look crazy.
High Fro Ponytail
Same concept as the low-fro pony tail with much more attention-grabbing look. Your hair will look huge but it will be off of your neck in the heat, and this style is primed for a cute headband or some long earrings to accessorize.
Half-Up, Half-Down
Slick back the top (leave your bangs out if you have them) and let the rest fro free. This style can show that you put in a little effort and lower your volume from huge to huge. Pair with a chunky headband or some cute barrettes.
Chunky Headbands Save Lives
All hail the chunky headband. If I’m in a remote jungle in Thailand or backpacking trip in Iceland there’s chance that I haven’t fully brushed my hair in a day or two. Chunky headbands are a great way to style a huge fro, a messy bun, or your cute braids. It can add a lot of color or pattern to your outfit as well.
“Just Shove All It In A Turban”
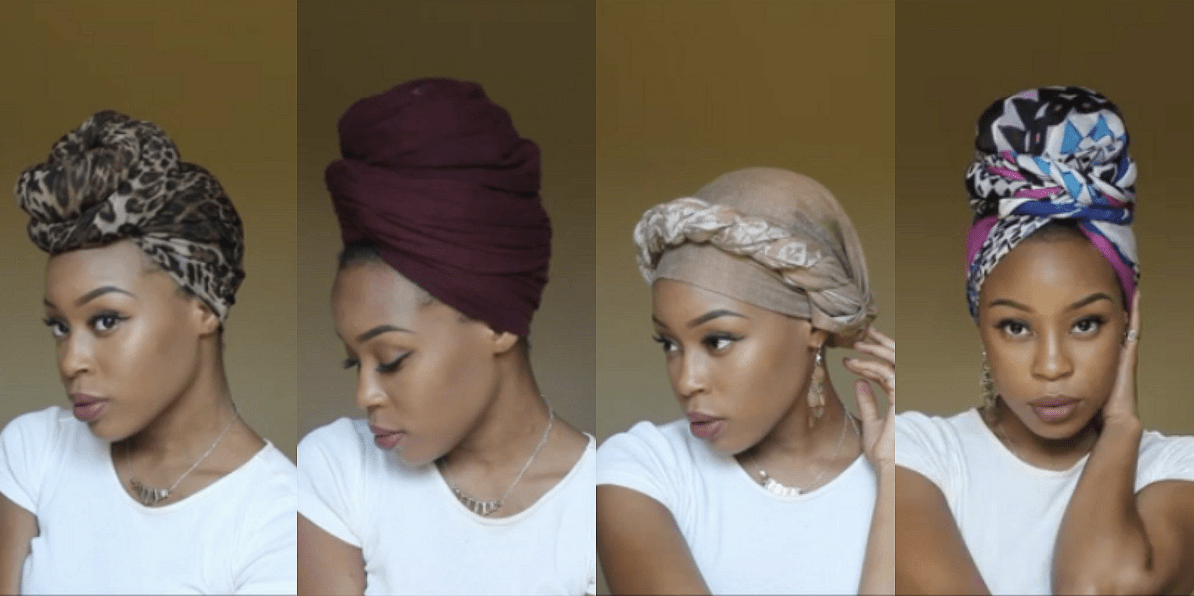
Like I said, curly hair isn’t as luxurious and easy breezy beautiful as we often make it seem. Sometimes your curls just do not cooperate, or you just don’t have the time to try. A turban or head wrap will be your saving grace on those red-eye flight, overslept your ziplining tour, rats nest, the-back-is-definitely-matted days.
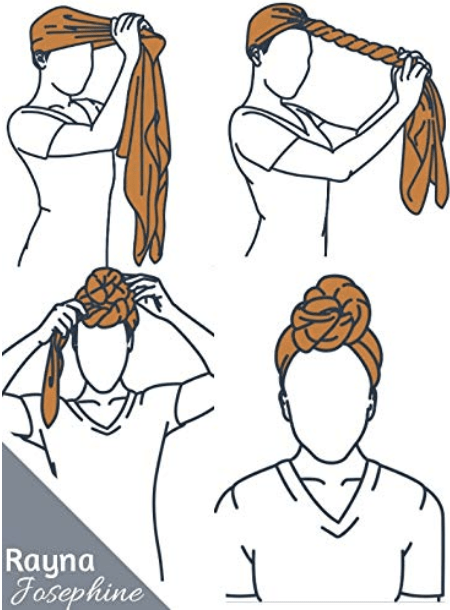
Pull back your hair and twist as flat to your head as you can and use spiral bobby pins (a curly MUST I tell you) to hold it together. Buy a couple in different colors so that you can rock them with any look. A turban is a great travel hair accessory because you can wear it in tropical weather with a dress or colder weather with a coat and scarf.
Double Top Buns
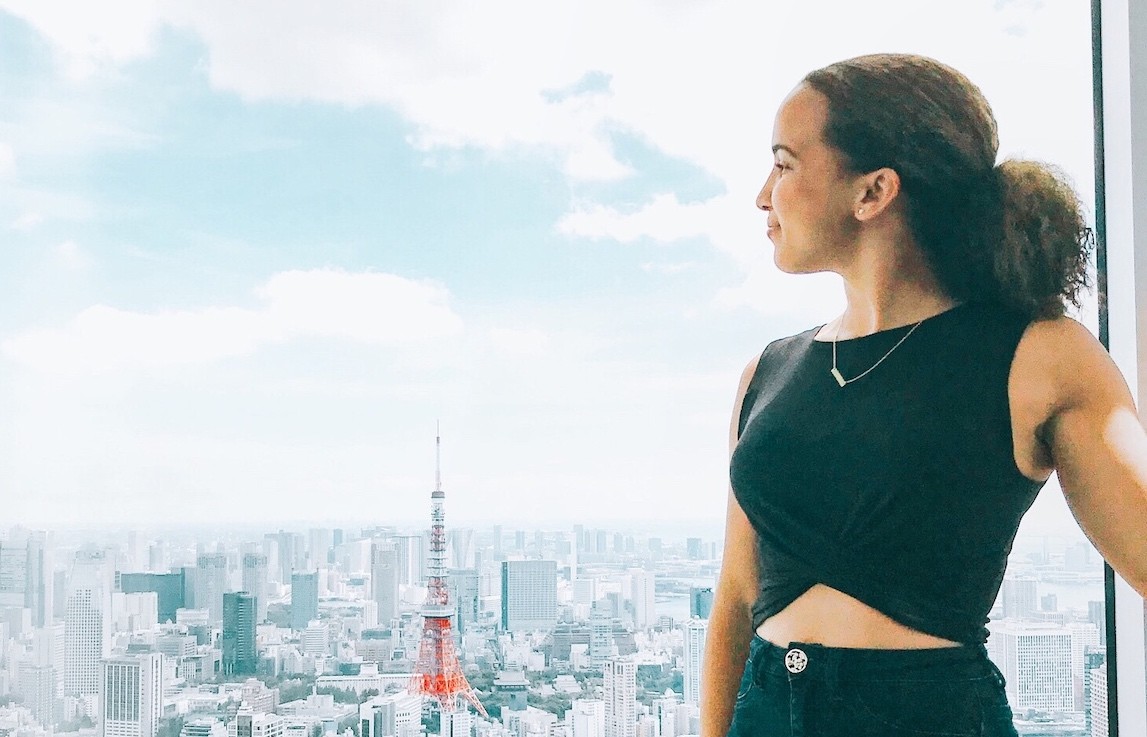
I was rockin’ this style in Tokyo and don’t even try to tell me different!
Try this look if you feel the want to stand out and have a unique sense of style, or just want to mix up your Instagram feed.
Half Braids
I like to separate my hair in half and basically braid the front down the sides along my hairline and let the back flow free. But you could do cornrows on the front half, two big braid down the back into open pig tails, braids into the Half Up Half Down. There are literally infinite options.
Experiment with some ideas and see what works. Even a few braids can give your hair some style that shows effort, and at least restrain a bulk of it, and those damn baby hairs.
Pros & cons of protective styles
I am not an expert in this department. Though I did a brief stint with clip-in extensions in high school, growing up neither of my parents introduced my sister and I to supplemental hair or braids. Thus, we had to suffer with our sun bleached, damaged, chemically relaxed hair. I wish they would have because when maintained correctly these protective styles are perfect for letting your curly hair rest and can cut down on your styling time when abroad. The most common protective styles are wigs, extensions, weaves and braids.
Because I lack expertise on this subject, I’m drawing on the experiences of few other curly-haired traveler, but mostly Lauren of Ciao Chicago.
Weave
If you love yourself… never attempt to get a weave the day before your trip.
Make sure to schedule installments a week or so before your trip so that your hair has time to loosen up and you have some ideas on how you will style it.
If you’re an active or adventurous traveler straight hair may be harder to maintain, especially against the natural elements. Choosing a curly or wavy bundle requires less styling and their shape will hold better, and may require you not to have to worry about blending your own hair while on the road. Though make sure to avoid any heavy products that will make your weave wear too fast between washes.
Extensions
Same advice for traveling with a weave if your extensions are glued or sewn in.
If you are traveling with clip-ins, make sure you bring extra clips and needle and thread in case you need to fix any loose clips, and tape for a temporary fix. Also make sure that when you’re not wearing your extensions they’re in a travel case that won’t ruin them.
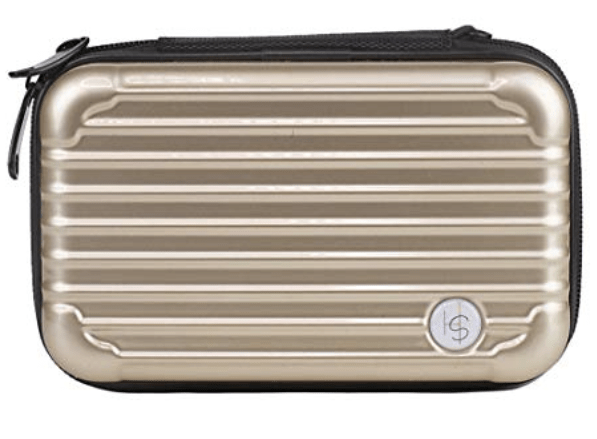
My favorite hack for clip-ins, weaves, and wigs is to get a plastic box used for markers and pencils to store them in. If you can’t find one, these hard cosmetic cases are amazing.
Wigs
The easiest style for an active or long-term traveler. You can go to the beach and just take off the wig and wash both it and your real hair.
Carry multiple wigs when you travel–2 or 3 for trips shorter than a week, 3 or 4 for longer—so you never have to be in a sticky situation where the one you have falls off on that moped ride and now you’re screwed.
Braids
Lauren says that braids and twists have a lot of variety in terms of style (Marley twists, Senegalese twists, goddess, braids, Ghana braids, etc), and leave access to the scalp for cleaning and moisturizing. Not to mention, they can last up to 6 weeks, which is great for an extended trip abroad.
Crochet braids are great for travel as they don’t require much skill—just the hair and some YouTube videos—and can last a travelista up to 3 weeks.
➰ TIP: Baseball caps + braids ≠ work. Curly hair in general. Buy a cute visor for some sun protection and to help hold that heavy braid bun off up when it’s hot.
To Straighten, or not to straighten?
In my journey to healthy curls I’ve been careful to rarely, if ever, put heat on my hair.
But unlike many curly traveling beauties I have not tabooed heat completely. Just because we’re curly doesn’t mean we’re dead. In moderation and with extreme care, straightening your hair does not have to mean heat damage and breakage and can make for beautiful and maintainable styles when traveling.
If I do straighten my hair it’s because the country that I’m going to has
- a low humidity index at the time, and/or
- it’s winter.
I straightened my hair before I went to the Republic of Georgia, The Netherlands, and Sweden but would have been wasting my time if I had before my trips to Colombia, Thailand, or Sri Lanka.
High heat + high humidity + tropical weather = …heck no.
There’s no point in straightening my hair if I’m just going to get off of the plane and sweat out my blow out because of the extreme heat or humidity or if I have plans to go swimming at the beach in the first few days that I land there.
Plus, if I’ve planned on having straightened hair on this trip I may not have brought all or enough of my curly products to maintain a curly style. An unexpected change of hair plans could have a devastating effect on my hairs health (and my ability to be in photos).
Low heat + low humidity + no water in sight = yaaas!
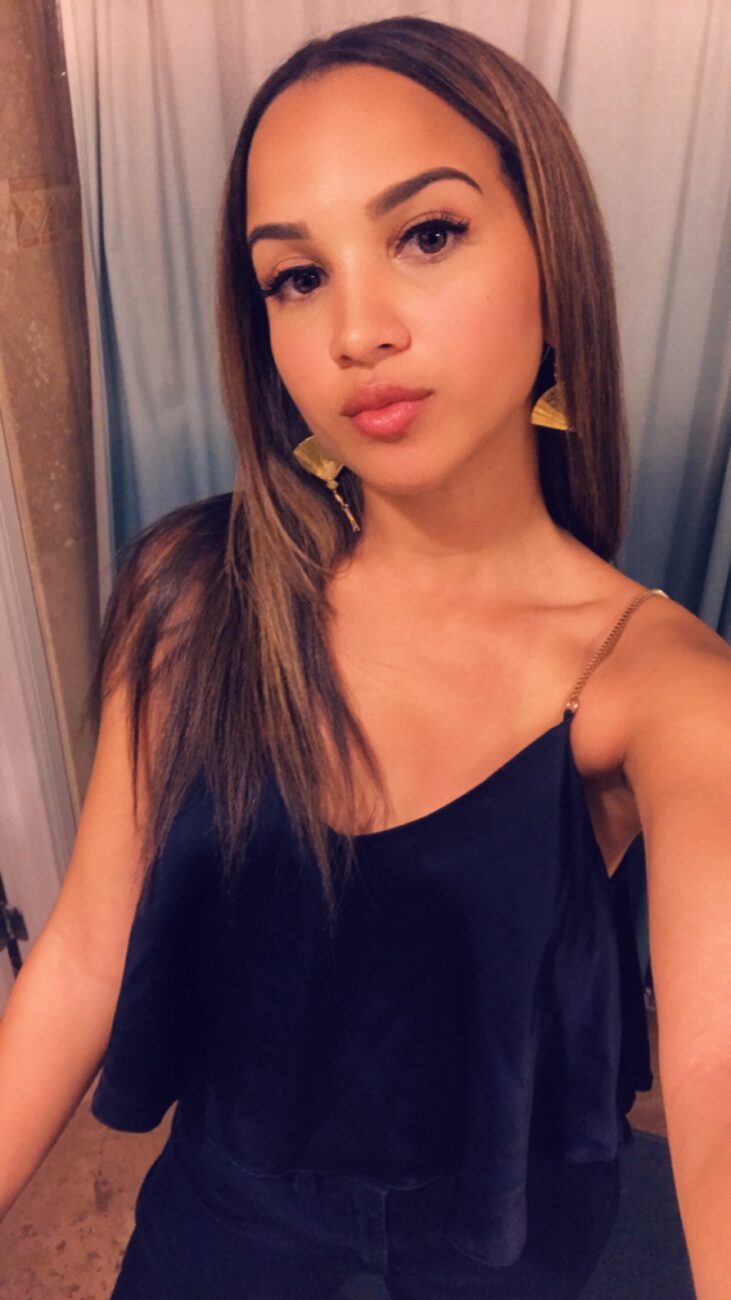
However, if it’s cold or wintry it’s usually in my benefit to have my hair be straight so that at least for a while I don’t have to get my hair wet every day to style it, and with the low humidity the style could last 3-6 days.
With straight hair you may have to bring less liquid products but you’ll be trading it for a styling tools. Bring a mini-flat iron for touch ups and leave the big one at home.
My Must-Have Straight Hair Hacks
To avoid the a bicep tear and 3 hours it usually takes me to straighten mine, I usually go to my local Paul Mitchell School to get it done “professionally”. I use quotation marks because as it’s a hair school your stylist is a student. And while it may take them 4-5 hours to straighten your hair, the professional products they use (that Awapuhi product line, PHEW) and the amazing price of $30 for a quality results, I don’t complain.
If I do straighten my hair it’s always with CHI Iron Guard Heat Protectant to protect from heat damage, as the key to smooth straight hair is a blow dryer and flat iron with extremely high heat, around 400°F. Trust me, high heat the first time locks in the style and reduces the need for touch-ups later.
Once I’ve landed in my vacation location I swear by Paul Mitchell’s Super Skinny Serum as the ultimate frizz control weapon and to keep my hair soft and moisturized. One or two pumps is more than enough to coat all of my hair so even though it’s slightly expensive this product lasts forever.
Of course the true key to long-lasting straightened hair is wrapping it at night. In my case, I either use a silk bonnet or the same head wrap I use to make my turban.
My Arch Enemy: The Perm
One technique you will never see me advocate for are chemical relaxers, also known as a perm. For most of my childhood my parents did not know how to manage my curls, and like many parents with black children turned to chemical relaxers. This resulted in dry, chemically damaged hair (and then heat damaged to maintain it), chemical burns on my scalp and neck, and a lifetime of self-confidence work to love my hair the way it grows out of my head.
If you do feel like you can’t handle your hair at its level of curl consider a Brazilian Blow Out or other keratin treatments which can temporarily loosen your curls or completely straighten your hair.
These treatments can last 3-6 months and are healthy for your hair as they coat and lock the follicle like straight jacket instead of breaking its bones like a chemical relaxer. Get these treatments every 6 months or try out one of the protective styles mentioned above for long-term maintenance.
Curly women (and men) having their hair groped and prodded during airport security is a common occurrence. While I understand the premise of it, it doesn’t make it any less invasive or agitating.
Unfortunately, part of traveling while curly hair is putting up with everyone else being super jealous of you (Kidding. Maybe.) So here are a few tips to make it easier.
Products
Have them 3-1-1 rule approved before you try to go through security. Then, make sure you’re carrying them in your purse and not zipped away in your suitcase. This way you can take them out, plop them into a security container for the x-ray, a minimizing time spent. I’ve also found labeling products “conditioner”, “shampoo”, “lotion”, etc. can keep them from stopping you to ask what is in each container.
The Dreaded Pat Down
Oh lawd, here we go. If you have big braids, dread locks, a weave, a wig, a fro, or any type of style that raises your hair an inch above your head, just assume you’re going to have your hair pat down and save yourself the stress. I truly believe that 90% of TSA agents are normal people just doing their job, but that 10% are the ones that cause the horror stories and the need for you to know our rights.
If you are taken aside for further screening of your hair, you have the right to request that the TSA agent puts on fresh set of gloves.
If they refuse or are being rude, you have the right to request a supervisor and/or request a private screening accompanied by a family member or friend. Do not go with them alone.
If you have any problems, please make sure a family member or you is documenting. Have a family member record as much of the encounter as possible, and take the name and ID number of as many agents as you can. Sometimes them knowing that you are paying attention and aren’t complacent can keep them from unnecessarily escalating a situation.
Global Entry/TSA Precheck, i.e. Security Clout
Save yourself some of the headache and get Global Entry if you’re able. It’s included with many credit cards these days, and less than one month ago I received mine complimentary of my Chase Sapphire Reserve card.
It really changed my life. Now I arrive at the airport 30 minutes before my flight begins boarding, have a minimal line, don’t have to take off my shoes or jacket, and breeze on through. Having TSA Precheck doesn’t make you immune to further searches or having your braids groped, but it can drastically decrease the chance of it happening because of your security clout.
Summary of My Must-Have Curly Products
You can save the complete list of products here and reference it whenever you need to.
Curly Styling Products
- Shea Moisture’s Extra Moisture Detangler https://amzn.to/2AHAKI4
- Shea Moisture Curl Enhancing Smoothie https://amzn.to/2jXKB3D
- Garnier Fructis Style Curl Scrunch Controlling Gel https://amzn.to/2VOBHr0
- Strengthen & Restore Leave-In Conditioner https://amzn.to/2sss6bH
- Literally anything from the Paul Mitchell Awapuhi Product Line https://amzn.to/2D9gd0N
Curly Styling Tools
- Microfiber Towel https://amzn.to/2AHV6kA
- Denman Brush https://amzn.to/2RPXK1a
- Soft Paddle Brush https://amzn.to/2Ch9gZO
- Boar Bristle Hair Brush (Cruelty Free) https://amzn.to/2SSnesj
- Silk Bonnet https://amzn.to/2SZBMpK
- Hard Cosmetic Case https://amzn.to/2SR7pC4
- Wig/Extension Clips https://amzn.to/2D8y3RA
Curly Hair Accessories
- Chunky Headbands https://amzn.to/2Ijzdh9
- Cute Visor https://amzn.to/2rJVkSM
- Turban/Head Wrap https://amzn.to/2M74kLE
- Spiral Bobby Pins https://amzn.to/2ChVh61
Straightening Styling Products
- CHI Iron Guard Heat Protectant https://amzn.to/2AUbu1x
- Paul Mitchell Super Skinny Serum https://amzn.to/2RNHgXt
Straightening Styling Tools
- KIPOZI Professional Hair Straightener https://amzn.to/2SSvngl
- Silver Bird Conair Pro Hair Dryer https://amzn.to/2spdjij
- Mini Travel Sized Flat Iron https://amzn.to/2VPwcZ3
If you found this article useful and want to save it to reference later you can pin one of the images below or share it it on another social media. If you have suggestions or questions, drop a comment too!
